

What Is Coffee Cupping? How to Taste Coffee Like a Professional at Home
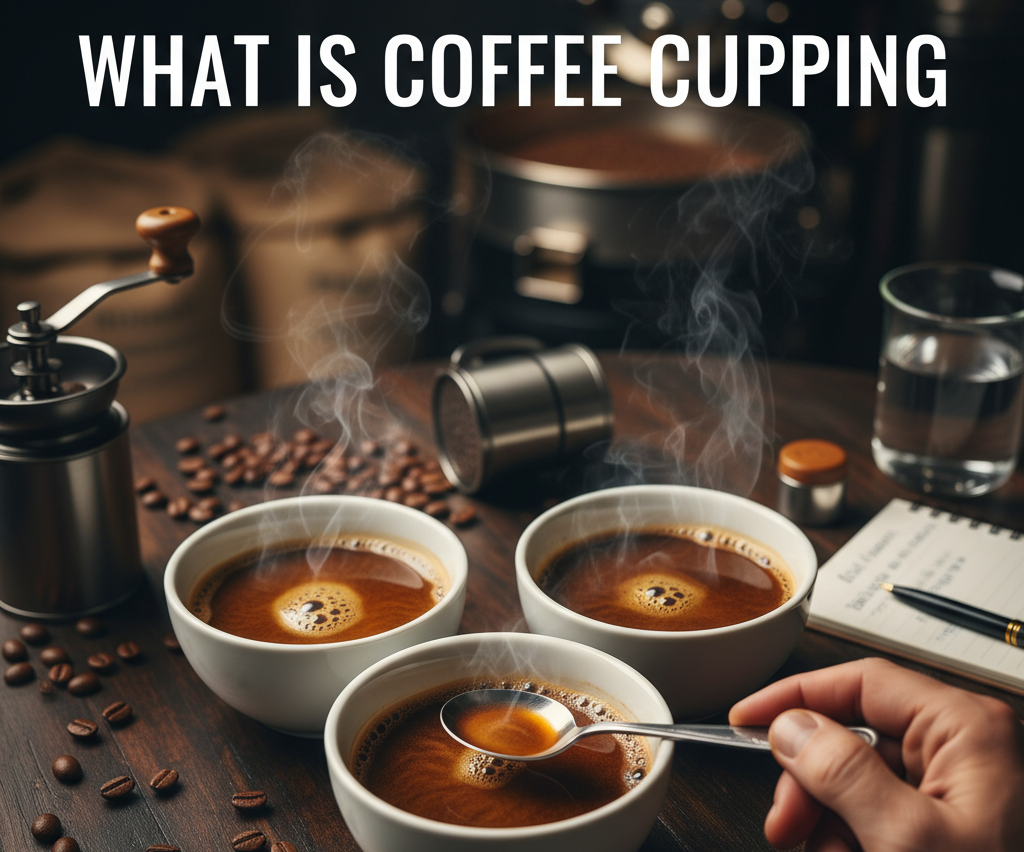
Every bag of specialty coffee you've ever opened — with its specific tasting notes, its origin details, its roast profile — got those descriptions through a process called cupping. Before a single bean is sold, roasters, green coffee buyers, and quality control specialists taste it using a standardized method that allows consistent, comparable evaluation across every sample, every batch, every origin.
That same method — demystified and simplified — is something you can do at home. Not to become a professional Q Grader, but to genuinely deepen your understanding of coffee, train your palate, and start experiencing the full range of what specialty coffee can offer.
Here's everything you need to know: what cupping is, why it exists, how the professionals do it, and how to run a meaningful session at home with equipment you probably already have.
Table of contents
- What Is Coffee Cupping?
- Who Uses Cupping and Why?
- How Is Cupping Different From Regular Coffee Tasting?
- The SCA Cupping Standard and the New CVA (2024)
- Why Do Cuppers Slurp? The Science Behind the Technique
- What You're Evaluating: The Key Cupping Attributes
- How to Cup Coffee at Home: Complete Step-by-Step Guide
- Home Cupping Tips for Better Results
- What Cupping Reveals That Regular Brewing Doesn't
- Frequently Asked Questions
- The Bottom Line
What Is Coffee Cupping?
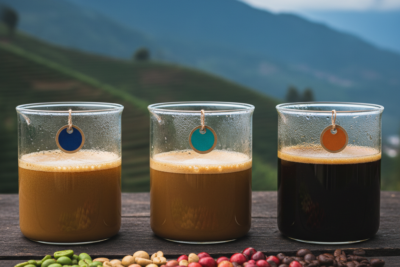
Coffee cupping is a standardized sensory evaluation method used to assess the aroma, flavor, body, acidity, sweetness, aftertaste, and overall quality of coffee. It involves brewing coffee in a specific, consistent way — without filters, without pressure, without variables — to create a neutral extraction environment where the coffee's true character can be evaluated objectively.
The word "cupping" refers to the cupping bowls traditionally used — wide, open ceramic vessels that allow the coffee to steep freely and release its full aromatic profile. The process has no filters between you and the coffee, no brewing equipment preferences to account for, and no preparation variables beyond the standardized ratio, grind, water temperature, and steep time.
That standardization is the entire point. When a Q Grader in Colombia cups a coffee alongside a buyer in Tokyo and a roaster in Toronto — all using the same protocol — their evaluations are directly comparable. Cupping is coffee's universal language for quality assessment.
☕ Recommended by cocondo.coffee
Cocondo Orgánico — The only certified organic coffee from Antioquia, Colombia
Reserve Your Bag →Who Uses Cupping and Why?
Cupping happens at every stage of the coffee supply chain:
- Green coffee buyers: Cup samples from farms and cooperatives to decide which lots to purchase before committing to container shipments. A single cupping session might evaluate 20 to 40 samples simultaneously — determining which coffees are worth buying and at what price.
- Roasters: Cup roasted samples to dial in roast profiles, compare development times, and ensure consistency across batches. The same coffee roasted three different ways will cup differently — cupping reveals which profile best expresses the bean's potential.
- Quality control specialists: Cup every production lot to catch defects, off-flavors, or inconsistencies before coffee reaches cafés and consumers. This is the coffee equivalent of quality assurance in manufacturing.
- Importers and exporters: Cup to confirm that a shipment matches the sample originally approved and that quality hasn't changed during transit or storage.
- Competition baristas: Cup extensively to develop palate depth, identify the flavor attributes of specific beans, and prepare for events like the World Cup Tasters Championship.
- Home enthusiasts: Cup to train their palates, compare coffees side by side, and develop the vocabulary and sensory skills to get more out of every cup they drink.
How Is Cupping Different From Regular Coffee Tasting?
Regular coffee tasting is casual and personal — you brew your coffee however you like, drink it, and form impressions. Cupping is systematic and standardized. The key differences:
- Standardized ratio: The SCA specifies 8.25 grams of coffee per 150 ml of water — a precise 1:18 ratio that creates a consistent strength across all samples
- Standardized grind: Medium-coarse, like coarse sea salt — consistent across all samples
- No filtration: Coffee steeps directly in the bowl, creating an immersion brew rather than a filtered extraction. This exposes more of the coffee's natural oils and compounds
- Standardized temperature: 93°C (200°F) water, poured at a specific time
- Standardized tasting protocol: Tasting happens at specific times as the coffee cools — professional cuppers evaluate at around 70°C (158°F), 55°C (131°F), and again at room temperature, since different attributes express themselves at different temperatures
- The slurp: Coffee is slurped forcefully from a spoon rather than sipped — for a specific scientific reason discussed below
This standardization means any two people following the protocol can produce directly comparable results — the brewing variables are eliminated, leaving only the coffee's intrinsic qualities as the variable.
The SCA Cupping Standard and the New CVA (2024)
The professional standard for coffee cupping has been governed by the Specialty Coffee Association (SCA) since it was codified in the 1980s. The SCA Cupping Protocol defined the ratios, temperatures, timing, and evaluation criteria that Q Graders worldwide use.
In 2024, the SCA introduced a significant update: the Coffee Value Assessment (CVA) — SCA Standard 102-2024 — which replaced the scoring form that had been in use since 2004. The CVA represents a more nuanced approach to quality evaluation, moving away from a simple 100-point scoring system toward a more comprehensive assessment of intrinsic quality and extrinsic factors (like defects). It also introduced updated protocols for sample preparation and a refined approach to sensory attribute evaluation.
For home cuppers, the practical protocol remains largely the same — the CVA primarily affects professional scoring methodology rather than the core brewing and tasting procedure. But knowing it exists signals that cupping standards continue to evolve as the specialty coffee industry's understanding of sensory science advances.

Why Do Cuppers Slurp? The Science Behind the Technique
The forceful slurp — pulling coffee from the spoon with an audible sucking sound — is not a social affectation. It serves a specific sensory function that most guides skip over.
When you slurp coffee, you aerosolize it — the forceful inhalation creates a fine mist of coffee droplets that travel across your entire palate simultaneously and, critically, are carried upward through the retronasal passage at the back of your mouth into your olfactory system. This retronasal smell — smelling from inside your mouth, not your nose — is responsible for most of what you perceive as "flavor." Your tongue primarily detects sweet, sour, salty, bitter, and umami. The complex flavor notes you associate with specific coffees — "blueberry," "jasmine," "dark chocolate" — are primarily retronasal olfactory sensations triggered by volatile aromatic molecules.
The slurp maximizes the amount of coffee that reaches your retronasal olfactory receptors simultaneously, spreading it across all areas of your palate and sending aromatic molecules up through the retronasal passage in a single moment of intense sensory input. Professional cuppers develop a particularly powerful slurp over time — it genuinely matters for detection of subtle attributes.
At home, don't be shy about the slurp. It sounds unusual in a kitchen setting but it's the entire point of the spoon technique.
What You're Evaluating: The Key Cupping Attributes
When professional cuppers evaluate a coffee, they're assessing specific attributes on the SCA form (or the new CVA). Understanding what each attribute means helps you focus your own home cupping session:
Fragrance / Aroma
These are actually two separate evaluations: fragrance is the dry aroma of freshly ground coffee before water is added; aroma is the wet aroma after hot water is poured. Both are evaluated separately because some coffees express their best aromatics dry, others after brewing. Evaluating both gives a fuller picture of the coffee's aromatic potential.
Ask yourself: Does it smell fruity, floral, chocolatey, nutty, roasty? Is the aroma complex or one-dimensional? Does the aroma change significantly between dry and wet?
Flavor
The overall impression of the coffee's taste — encompassing everything your palate detects from first sip through mid-palate to swallow. This is where tasting notes like "blackberry," "caramel," or "brown sugar" live.
Ask yourself: What is the first flavor you notice? What develops as the coffee sits on your palate? Does the flavor match the aroma you smelled?
Aftertaste
The sensory impression that remains after swallowing — what lingers in your mouth 10 to 30 seconds after the sip. A good coffee has a long, pleasant aftertaste; low-quality or poorly extracted coffee drops off immediately or leaves an unpleasant bitterness or sourness.
Ask yourself: Is the aftertaste pleasant or unpleasant? Does it fade quickly or linger? Does the aftertaste introduce new flavors that weren't present in the primary sip?
Acidity
Not sourness — acidity in quality coffee is a positive attribute: the bright, lively, refreshing quality that makes coffee feel alive rather than flat. Acidity is evaluated for both quality (is it pleasant or harsh?) and intensity (strong, medium, or light?). Kenyan and Ethiopian coffees typically have high, desirable acidity; Brazilian and Indonesian coffees tend toward lower acidity.
Ask yourself: Does the coffee have a bright, lively quality? Does the acidity feel clean or harsh? Can you identify the type — citric, malic, tartaric?
Body
The physical weight and texture of the coffee in your mouth — its mouthfeel. A full-bodied coffee feels rich and coating; a light-bodied coffee feels thin and delicate. Body comes primarily from dissolved solids, oils, and colloids in the brew. French press coffee typically has more body than filtered coffee; cold brew has a distinct, syrupy body.
Ask yourself: Does the coffee feel heavy or light in your mouth? Does it coat your tongue? Is the body pleasant or distracting?
Balance
How well the various attributes — flavor, aftertaste, acidity, and body — complement each other. A balanced coffee is one where no single attribute overwhelms the others; everything is in proportion. Exceptional single-origin coffees can be intentionally unbalanced in interesting ways (a very high-acidity, light-bodied Ethiopian natural, for example); great blends are typically designed for balance.
Ask yourself: Does one attribute overwhelm the others? Does the coffee feel complete, or is something missing?
Sweetness
Natural sweetness — the presence of sugars that survived roasting and extraction. Well-processed, freshly roasted specialty coffee has genuine sweetness that requires no added sugar. Sweetness is one of the attributes most sensitive to coffee freshness and roast quality — stale or poorly roasted coffee typically lacks sweetness entirely.
Ask yourself: Does the coffee have a naturally sweet quality? Can you detect caramel, brown sugar, or fruit sweetness?
Clean Cup
The absence of off-flavors, defects, or taints that interfere with the coffee's clarity. A "clean" coffee allows its positive attributes to shine without interference. Defects might include fermentation taints, mold, phenolic or medicinal notes, or rubber-like flavors — all indicators of problems at the farm, processing, or storage level.
Ask yourself: Are there any unpleasant or confusing flavors that don't belong? Is the flavor profile clear and focused or muddied?
Uniformity
In professional cupping, five cups are prepared per coffee sample. Uniformity measures whether all five cups taste the same. If one cup has a defect or tastes notably different, uniformity score drops. At home, you can evaluate uniformity if you prepare two cups per sample — which the professional protocol recommends even in informal settings for exactly this reason.
Overall / Cupper's Points
A holistic evaluation that captures anything not addressed by the specific attributes — personal response, complexity, completeness, emotional impact. This is the "is this a remarkable coffee?" question separate from the technical evaluation.
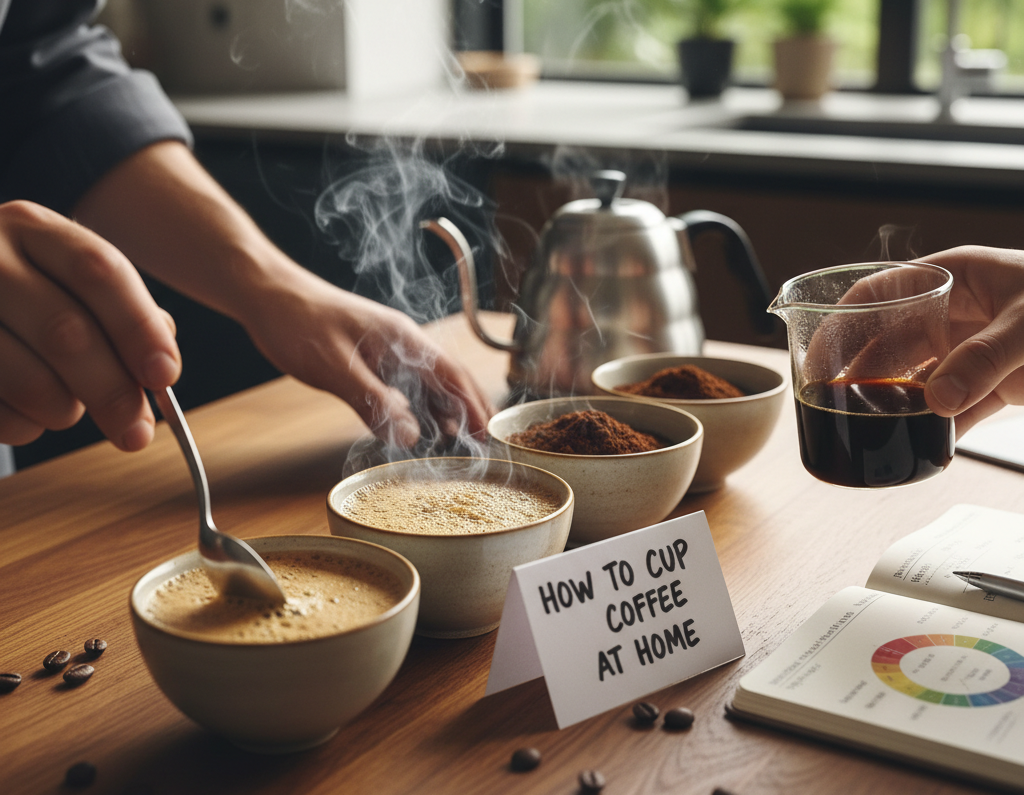
How to Cup Coffee at Home: Complete Step-by-Step Guide
What You Need
Essential equipment:
- 2 to 4 wide ceramic bowls, mugs, or glasses (160 to 250ml capacity) — identical sizes
- A kitchen scale accurate to 0.1 grams
- A burr grinder (hand grinder is fine)
- A kettle — gooseneck preferred but standard works
- A timer
- 2 to 3 spoons — deep-bowled soup spoons work perfectly
- 1 to 2 glasses of hot water for rinsing spoons between samples
- A notebook for tasting notes
Coffee samples: Choose 2 to 4 different coffees for your first session — ideally from different origins or different processing methods. The comparison is what teaches you the most. Good starter comparisons:
- Ethiopian natural vs Colombian washed (fruity/complex vs clean/balanced)
- Light roast vs medium roast of the same origin (shows roast impact)
- Two Colombian coffees from different regions (shows terroir differences)
All coffees should be roasted within the past 5 to 21 days. Stale beans produce flat, uninteresting cups that don't reward the effort of cupping.
Step 1: Set Up Your Space
Choose a quiet space with no competing aromas — away from cooking smells, perfumes, or cleaning products. The SCA recommends a well-lit, comfortable temperature, distraction-free environment. Turn off background music. This sounds precious, but sensory focus genuinely improves detection of subtle flavors. Before the session, avoid strongly flavored foods, coffee, or anything that might affect your palate's sensitivity for at least 30 to 60 minutes.
Label your bowls clearly — a small piece of tape with the coffee name works perfectly. For a more challenging exercise (and more objective results), do it blind: have someone else label the cups without telling you which is which, revealing identities only after you've recorded your notes.
Step 2: Measure and Grind
Weigh out 8.25 grams of coffee per 150ml of water for each bowl. For home purposes, rounding to 8 to 9 grams per bowl is fine. If you're using 200ml cups (which is easier at home), scale up to 11 grams per cup.
Set your grinder to medium-coarse — roughly the texture of coarse sea salt or raw sugar. Grind into the bowl directly if possible, or into a separate container and pour carefully.
Critical step: Before grinding each new coffee sample, grind a small amount (2 to 5 grams) of the same coffee to "flush" the grinder of any residual grounds from the previous sample. Discard this flush. Residual coffee in your grinder will contaminate the next sample and compromise your results.
Grind all samples within 15 minutes of tasting to preserve aromatic freshness — the same principle as the 15-15-15 rule applied to cupping.
Step 3: Assess the Dry Fragrance
Before adding water, bring each bowl close to your nose and inhale deeply with your mouth slightly open. The open-mouth technique drives more aromatic molecules through your retronasal passage simultaneously. Take 2 to 3 deep inhalations per bowl.
Take notes: What are your immediate impressions? Fruity? Chocolatey? Floral? Roasty? Don't overthink it — write whatever comes to mind, even if it seems strange. "Reminds me of walking into a bakery" is useful information.
Move through all samples in the same order, rinsing your nose between them by sniffing the back of your wrist (a neutral skin smell that resets your olfactory receptors). Compare your notes across samples before adding water.
Step 4: Add Water and Start Your Timer
Heat water to 93–96°C (200–205°F). Pour 150ml directly over the grounds in each bowl, making sure all grounds are fully saturated. Pour in a circular motion to wet the grounds evenly. Start your timer the moment water touches the first bowl.
A floating "crust" of coffee grounds will form on the surface — this is normal and expected. Do not disturb it. The crust is part of the extraction process.
Take note of the wet aroma immediately after pouring — lean in and inhale. This is the most volatile aromatic moment of the session: CO2 is escaping, aromatic compounds are releasing, and the coffee is expressing its full aromatic potential in the first 30 to 60 seconds after water contact.
Step 5: Break the Crust at 4 Minutes
At exactly 4 minutes, use the back of your spoon to gently push through the crust of each bowl — three gentle pushes is standard. As you break the crust, bring your nose close to the surface and inhale deeply. This moment releases a concentrated burst of aroma that is one of the most distinctive sensory experiences in cupping.
The aroma at crust-breaking often reveals attributes that weren't present in the dry fragrance — a bright citrus note that was hidden, a deep chocolate richness that emerges with heat, or sometimes an unpleasant fermentation note that signals a defect.
Rinse your spoon in your hot rinse water between each bowl to prevent cross-contamination of aromas.
Step 6: Skim the Crust
After breaking the crust of all bowls, use two spoons to skim the floating grounds and foam from the surface of each bowl. Remove only the surface material — avoid stirring up the settled grounds at the bottom. You're clearing the surface for clean tasting, not agitating the brew.
Discard the skimmed grounds in a separate cup or waste bowl.
Step 7: Wait and Taste Through the Temperature Curve
Allow the coffee to cool. Professional cuppers begin tasting when the coffee reaches approximately 70°C (160°F) — typically 8 to 12 minutes after pouring. At home, 10 minutes is a good starting point.
Use your spoon to take a generous amount — about a tablespoon — and slurp it forcefully. The slurp should be audible. Spread the coffee across your entire palate, coating your tongue, cheeks, and soft palate. Hold it for 2 to 3 seconds before swallowing (or spitting into a waste cup if you're doing multiple rounds and want to limit caffeine).
Take notes on every attribute: flavor, acidity, body, sweetness, aftertaste. Rinse your spoon between each coffee sample. Move through all samples in the same order each time.
Taste the coffees again as they cool — at 55°C (130°F) and again when close to room temperature. This is where cupping reveals its deepest insights: flavors that were hidden at high temperatures emerge as the coffee cools. A coffee that seemed flat at 70°C might reveal remarkable floral notes at 55°C. A coffee that seemed acidic might develop sweetness as it cools. Professional cuppers make their most important evaluations at this lower temperature range.
Step 8: Compare, Discuss, and Record
Go through your notes for each sample. Compare: Which coffee had the most complex aroma? Which had the longest aftertaste? Which had the brightest acidity? Which was the most balanced? Which surprised you?
If you're cupping with others (which dramatically enhances the experience), compare notes and discuss discrepancies. It's completely normal for two people to perceive the same coffee differently — the discussion of "why" is where palate development happens fastest.
Check your notes against the tasting notes on the coffee bag. You don't need to match them exactly — but noticing when you do, and understanding why when you don't, builds your sensory vocabulary session by session.
Home Cupping Tips for Better Results
- Start with 2 coffees, not 4 or 5. Comparing two coffees teaches you more in your first session than comparing five. Palate fatigue sets in quickly when you're learning — keep it manageable.
- Use identical vessels. Different cup shapes and materials affect heat retention and evaporation. Using identical cups eliminates this variable so you're comparing coffees, not vessels.
- Cup the same coffee multiple times. Return to each sample 3 to 4 times throughout the session. First impressions are often incomplete — your palate calibrates with each successive tasting.
- Take notes in real time. Memory for flavor is weak and fades quickly. Notes taken immediately are far more accurate than recollections made at the end of the session.
- Use your Coffee Flavor Wheel alongside your notes. When you detect something but can't name it, the wheel gives you vocabulary to narrow it down.
- Invite friends. Cupping with others — even non-coffee people — is dramatically more educational and enjoyable than cupping alone. Different palates pick up different attributes, and the collective description is always richer than any individual's.
- Cup the same coffees blind and un-blind. Our expectations profoundly affect what we taste. Cupping blind first (without knowing which coffee is which), then revealing the identities and tasting again, often produces surprising revelations about how much preconceptions shape perception.
What Cupping Reveals That Regular Brewing Doesn't
One of the most illuminating aspects of cupping is how much it reveals about coffees that brewing method preferences typically obscure. A coffee that seems mediocre when brewed as espresso might reveal remarkable complexity when cupped — because the espresso brewing process was suppressing rather than expressing its character. A coffee that tastes exceptional from a pour-over might cup unexpectedly flat — suggesting its qualities depend on that specific brewing method's highlight.
Cupping strips away method preferences and shows you the coffee itself. It's why roasters cup rather than brew to evaluate quality: the method is neutral, the coffee does the talking.
Frequently Asked Questions
What is coffee cupping?
Coffee cupping is a standardized sensory evaluation method used throughout the coffee industry to assess the aroma, flavor, body, acidity, sweetness, aftertaste, and overall quality of coffee. It involves brewing coffee at a specific ratio (8.25g per 150ml) without filtration, in identical cups, at a standardized temperature — then evaluating the coffee through a defined protocol as it cools. It is used by green coffee buyers, roasters, quality control specialists, and enthusiasts to evaluate and compare coffees in a consistent, reproducible way.
How is cupping different from tasting?
Regular coffee tasting is casual and personal — you brew however you like and form subjective impressions. Cupping is standardized and systematic: specific ratios, specific grind, specific temperature, specific timing, and a defined tasting protocol including the forceful spoon slurp. The standardization allows direct comparison between different coffees tasted by different people — the brewing variables are fixed, leaving only the coffee's intrinsic qualities as the variable.
Why do coffee tasters slurp?
The forceful slurp aerosolizes the coffee — creating a fine mist that simultaneously coats the entire palate and carries aromatic volatile compounds through the retronasal passage (the back of the mouth connecting to the olfactory system). Retronasal smell is responsible for most of what we perceive as "flavor." Slurping maximizes the retronasal aromatic exposure that allows tasters to detect subtle flavor notes that a regular sip would miss. The technique also ensures even distribution across all taste receptor zones on the tongue.
What equipment do I need to cup coffee at home?
For a home cupping session you need: identical ceramic bowls or mugs (160 to 250ml), a kitchen scale, a burr grinder, a kettle, a timer, 2 to 3 deep-bowled spoons, glasses of hot water to rinse spoons between samples, and a notebook. No specialized equipment is required. The essentials that matter most are the scale (for consistent ratios) and the burr grinder (for consistent grind). Everything else can be improvised from standard kitchen equipment.
How many coffees should I cup at once?
For beginners, 2 to 3 coffees per session is ideal — enough to make meaningful comparisons without overwhelming your palate. Professional cuppers often evaluate 10 to 40 samples in a single session, but they have years of trained sensitivity and standardized conditions. At home, 2 to 4 well-chosen coffees from different origins or processes will teach you more in one session than a large number of similar samples.
The Bottom Line
Coffee cupping is one of the most rewarding things you can do as a coffee enthusiast. It's not complicated, it doesn't require professional equipment, and it transforms coffee from something you consume into something you genuinely understand.
The process is simple: measure, grind, smell dry, add water, smell wet, break the crust, skim, slurp, repeat as it cools, take notes, compare. Done consistently over time, cupping builds a sensory vocabulary and palate depth that makes every cup of coffee you drink more interesting — not just during formal sessions, but in your daily brewing.
The coffees worth cupping are the ones with enough complexity to explore. Single-origin specialty coffee — particularly from origins known for expressive, distinctive profiles like Ethiopia, Kenya, or Colombia's high-altitude growing regions — rewards cupping with layers of flavor that commercial blends simply don't contain. If you want a compelling first cupping session, find a freshly roasted Ethiopian natural and a Colombian washed from the same roaster, cup them side by side, and prepare to be surprised by how different they are.
That surprise — tasting something you didn't expect from a plant-based beverage you thought you already knew — is what cupping is really for.
If you'd like to read other articles similar to What Is Coffee Cupping? How to Taste Coffee Like a Professional at Home you can visit the category The Art and Science of Coffee: Guides, Reviews, and Expert Tips.
Does Coffee Affect Cortisol Levels? The Science Behind Caffeine and Your Stress Hormone

Is Coffee Good for Depression Risk? What the Research Actually Shows

Is Coffee Bad for Anxiety? What the Science Actually Shows
The 5 Elements of Coffee Tasting Every Coffee Lover Should Know
What Is Green Coffee? How Raw Beans Differ From Roasted — and What That Means for Your Health
How Is Coffee Decaffeinated? The 4 Methods Explained — Including the One You Should Avoid
What Is Coffee Degassing? Why Fresh Roasted Beans Release CO2 — and Why It Matters
What Is a Coffee Cooperative? How They Help Farmers — and Why They Matter for Your Cup
How Altitude Affects Coffee Flavor: Why High-Grown Coffee Tastes Different
Leave a Reply
Related post